How to add a web part to every users MySite in 5 minutes
This post will outline how to add a web part to every users MySite. The web part we are going to add is the standard DocRead Reading Tasks web part, but this process can be applied to any web part in SharePoint.
MySite host vs the users individual ‘content’ site an introduction
When people refer to a MySite, it can be confusing as to what that site is. Is it the same site, a sub site or a site collection? The answer is, it’s a combination of a few things as follows:
The MySite Host
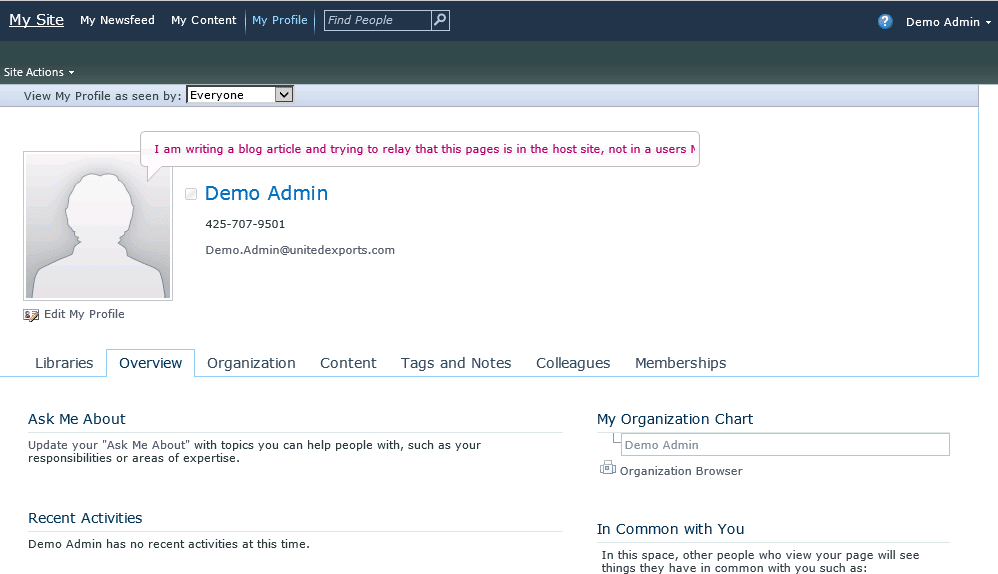
This is a site collection that is set-up to act as the ‘main‘ site for all MySite’s. The purpose of this site to maintain content that should be accessible for all users. There are several pages that are deployed that ‘appear’ to be part of a users MySite, but are actually in the host site. In other words, there is only 1 instance of these pages.
The users personal ‘content’ site
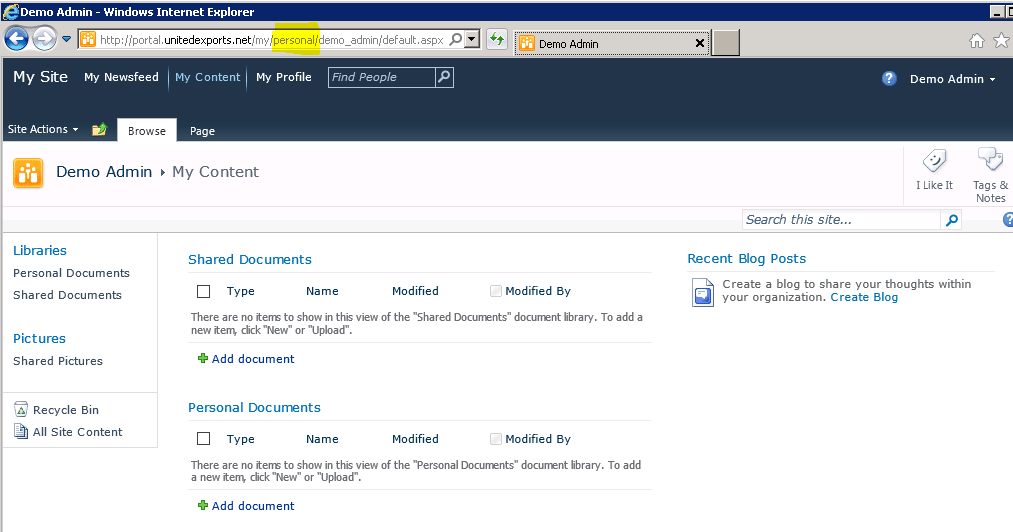
This site collection is used to store a users personal documents. It’s a completely, separate site from the MySite Host. It’s also very common to only provision this site when a user clicks on the ‘My Content’ menu. Once the site is created, the user will be the sole site collection administrator. If they choose to add a document to the ‘shared documents’ library, this will be effectively viewable by anyone with access to SharePoint.
As the users personal site is a separate Site Collection this means they can configure it to how they need it to look. Given permissions, they can add pages, edit pages add web parts and so on.
So, if I want a web part to appear on every users MySite what do I do?
You have a decision to make! Do you put it into the personal content site, or do you put it into the main MySite Host Site?
As you can imagine, like many SharePoint decisions, there’s an up and down side to both!
Place a Web Part into the users personal content site
This approach means that every user gets a completely unique instance of that web part. So if the web part needs to be customized on per user basis, this may be the way to go. However, you need to take into account that you will need to deploy the web part to every users site and also any new sites that get created. In most organizations, this can only be done via a script, meaning you need IT to get involved.
There are also ramifications if you need to upgrade, amend or change this web part.
If you can avoid this approach, you should!
Place a Web Part into the MySite Host
This solution involves adding the web part to a new (or existing) page in the MySite host. Once you have done this once, it will be available for all users. It’s also quick to do and far easier to upgrade and maintain.
The remainder of this post will outline how to achieve the 2nd option. So please read the following steps.
Steps to add a web part to every users MySite
Warning! Please do this in development first. The pages within the MySite host have no versioning capabilities, so when you change it, it’s changed for everyone immediately. Also back it up beforehand.
Setting the Scene
The following steps illustrate exactly how to add the DocRead Web Part to the MySite host, but as mentioned, this can really be *any* SharePoint Web Part. So when we show / talk about DocRead just swap it around in your mind.
Step 1 : Ensure the web part is available
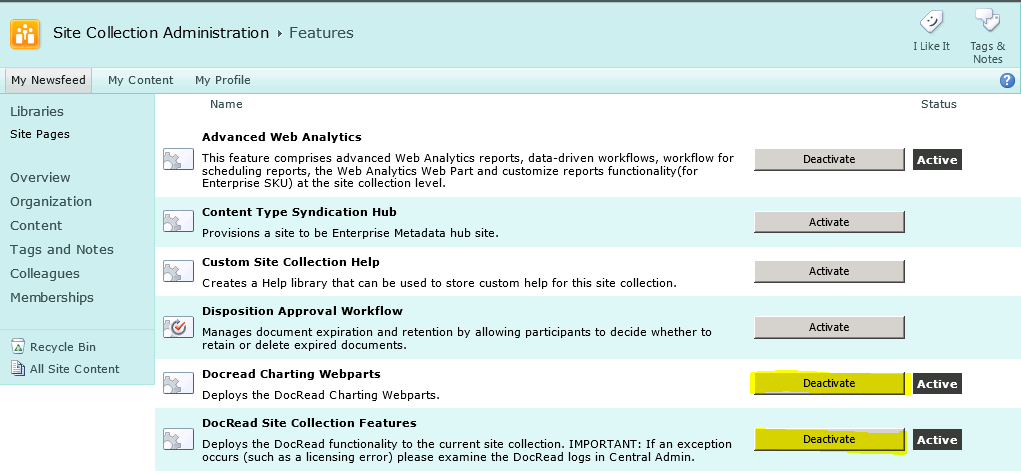
Most web parts need to be added to the Site Collection Web Part Gallery. Once they are in here, you can add them to the your page. There are a few ways that a web part can be added to the Gallery, such as being uploaded, scripted or brought in via a SharePoint Feature. In our example, the DocRead Web Part is brought in via a feature like this :
1. As a Site Collection Admin, navigate to the ‘Site Settings’ screen of your MySite host.
2. Choose ‘Site Collection Features’
3. Hit Activate on the Feature that imports your web part.
In the example above, we have activated two DocRead features which import our charting and reading task web parts. Clicking them again would deactivate them.
Step 2 : Create a new page (or copy an existing one) with SharePoint Designer
Next you need to select the page where you want to put the web part. You can either add it to one of the existing pages or create a new one. Either way, both approaches require Step 3.
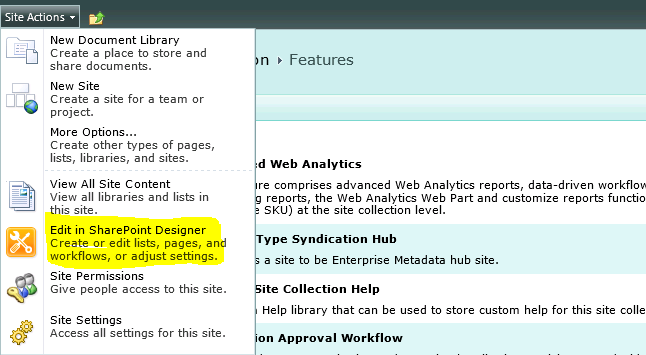
1. As an Administrator, navigate to the MySite host collection and select ‘Edit in SharePoint Designer’.
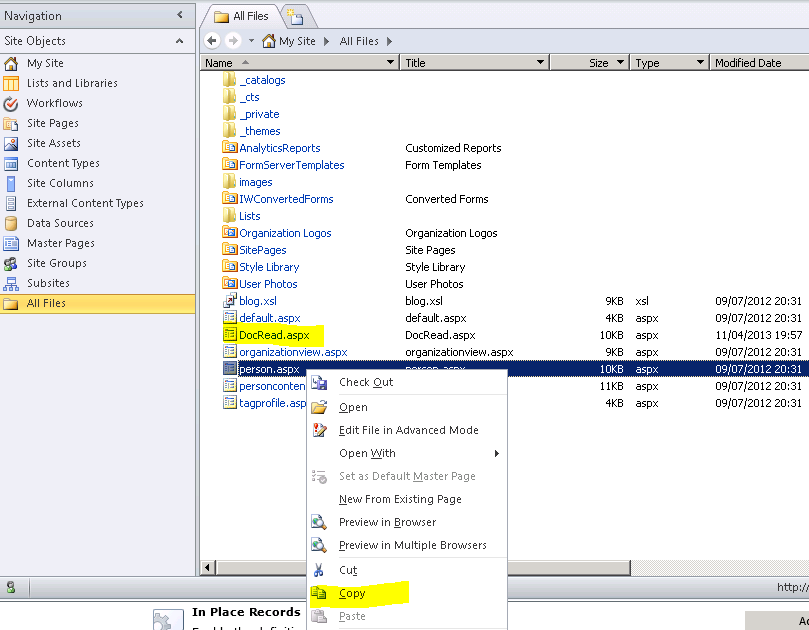
2. Once SharePoint Designer is loaded find a page you want to copy (we chose ‘person.aspx’).
3. Right click it and choose ‘copy’ then ‘paste’.
5. Rename your page to something meaningful. We called ours “DocRead.aspx”.
4. Now click ‘Preview in Browser’. At this point the browser will open and your new page will show. It should look identical to the one you just copied.
Step 3 : Add the web part to the page
This step is all about adding your web part(s) to the new page (‘DocRead.aspx’).
1. From the Site Actions menu (of your new page), select ‘Edit Page’. This will now put the page into Edit mode and will allow you add the web part.
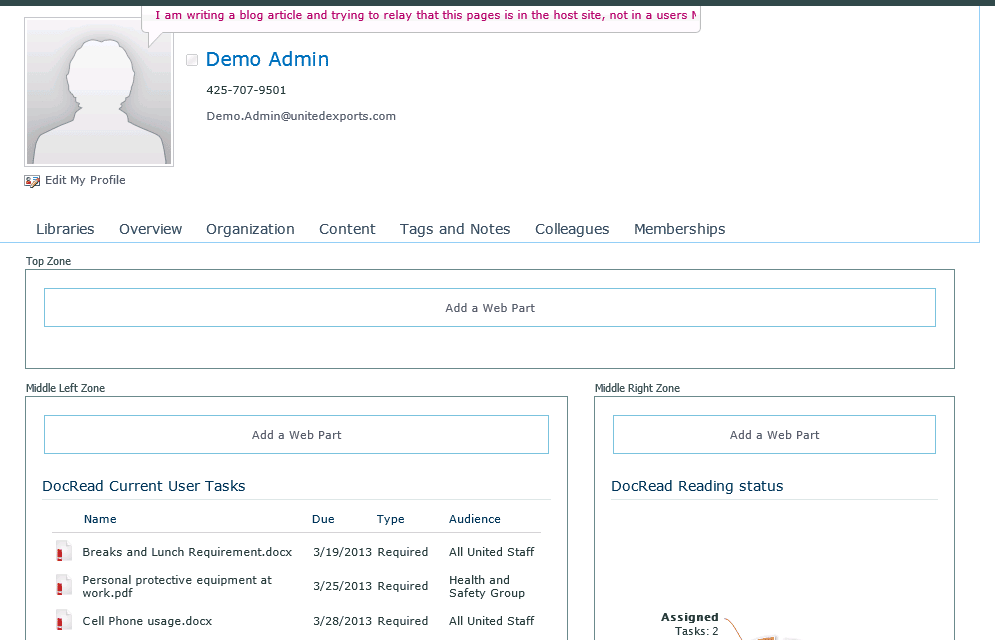
Once your web part is added it should look something like this.
That’s it – your web page is now created (and saved at this point).
Step 4 : Add a tab item to the page (optional)
The last step is to add a new Tab to the standard MySite menu as follows :
1. As a Site Collection Admin, navigate to the ‘Site Settings’ screen of your MySite host.
2. Choose ‘Quick Launch’ under ‘Look and Feel’.
3. Select ‘New Heading’ and input the Url of your (new) page and add the description you would like displayed.
Now if you navigate to the new MySite host page the tab will be there.

