The Difference Between Governance Infrastructure and Governance Theater Most organizations don’t lack governance. They ...
Using a basic SharePoint workflow to approve a policy change
SharePoint Server 2016 SharePoint Server 2013 Enterprise
SharePoint approval workflows can be used for a variety of different purposes. In this post I’m going to show how a SharePoint Policy Approval workflow can be used when a document / policy or procedure is changed.
What is SharePoint workflow?
Workflows help encourage collaboration on items, documents and projects by ensuring business processes are followed. The business process can be created as a workflow to manage the individual steps and tasks required. By creating an using a workflow you can ensure that the correct steps occur in the right order and by the right people - every time!
What is a SharePoint approval workflow?
According to Microsoft: "An Approval workflow is a SharePoint feature that routes a document or other item stored in a SharePoint list or library to one or more people for their approval or rejection. The workflow automates, streamlines, and standardizes the whole process."
The short (<4minutes) video below demonstrates this process in practice.
Creating a SharePoint workflow.
First, you need to create or update the item or policy you want to use in your workflow. If you already have one ready to circulate, jump to step 2.
1) Prepare / update your Policy
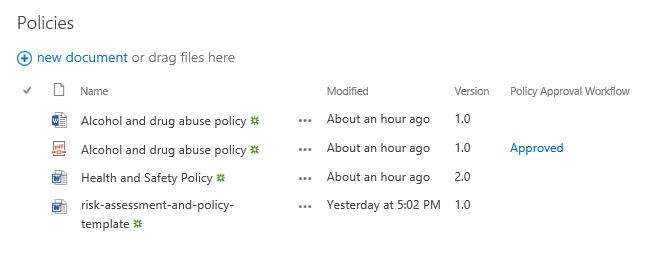
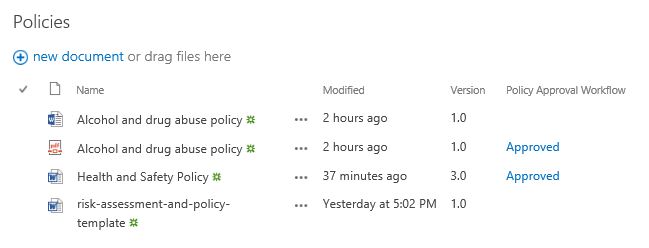
Let's consider a Health and Safety policy that needs to be revised. Revisions can be required for a variety of reasons including legislation changes, to reflect new circumstances or simply to update the policy for a new year. In the SharePoint library below you can see that currently version 2 is available.
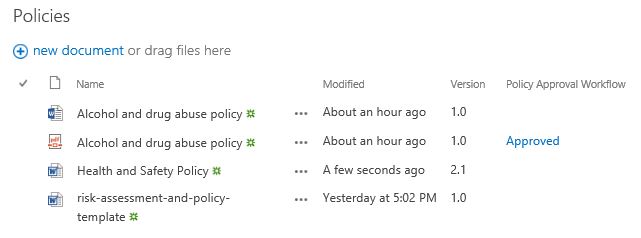
I'm using versioning on this SharePoint library. Therefore, after accessing the policy, making the necessary changes and saving the work, the policy has the version number 2.1. Each time the document is amended and changed the version number will increment by 0.1.
After all of the changes have been made you need to create a major version. To do this, click on the ellipsis twice and select the 'Publish a Major Version' option as shown below.
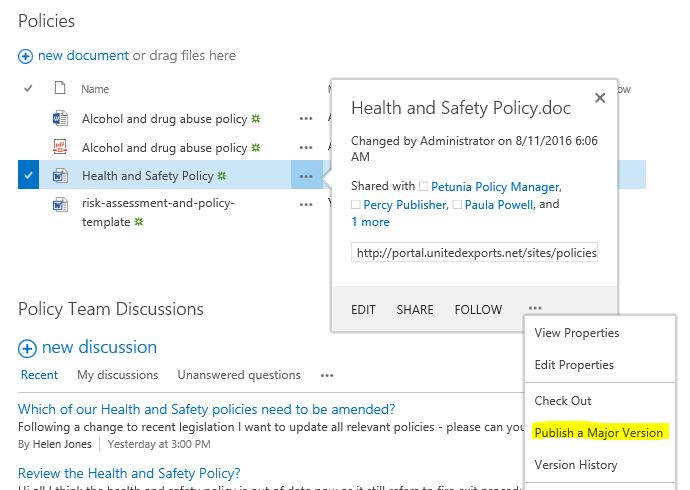
You can also add any relevant comments about the policy as you do this.

The version number now shows as 3.0 as below.
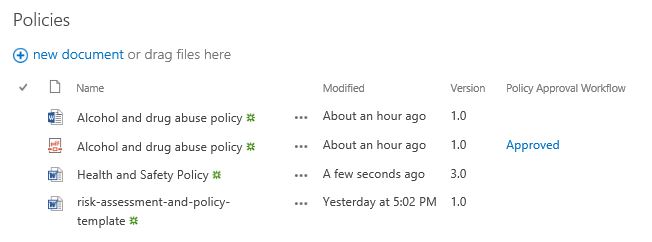
Now the item is finished we can start a SharePoint workflow to gain formal approval for this version.
Note: you may wish to save your policy as a PDF (and create a major version) before following the rest of these steps with the PDF version.
2) Create the SharePoint Policy Approval Workflow
If you already have a policy ready to distribute, here are the step by step instructions.
Firstly, follow the ellipsis and select the 'Workflows' option as shown.
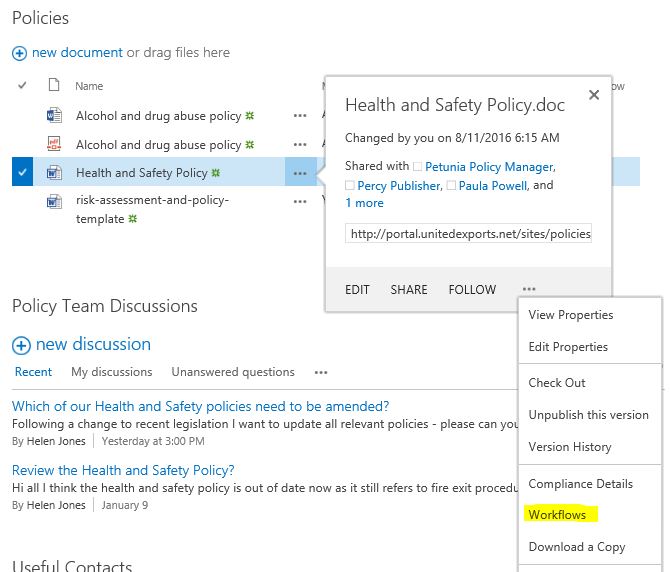
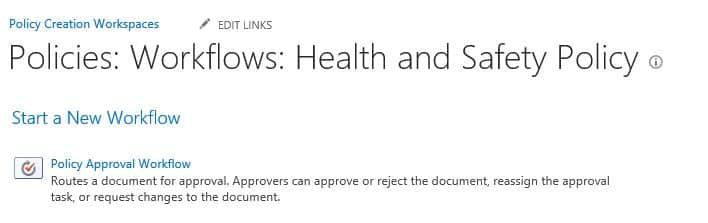
This will take you to a screen where all of the workflows that are available on this site are shown. In this case, I want to use the Policy Approval Workflow.
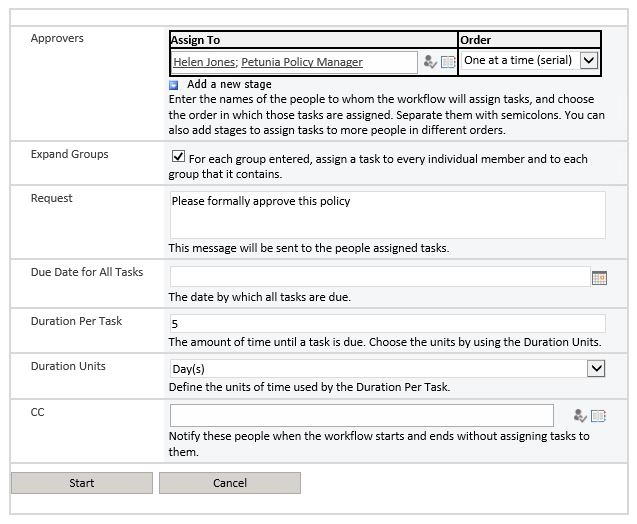
This workflow has been designed to ask 2 people to formally approve the item. You can add as many individuals as you need to this process. You have the option of asking them to complete the tasks one after the other (in serial) or all at the same time (in parallel). If you chose a serial order the second task won't be created until the first one is completed. Parallel tasks are all created at the same time which can ensure all tasks are completed faster. However, this means you can't follow a specific order if you need one specific person to have a final say.
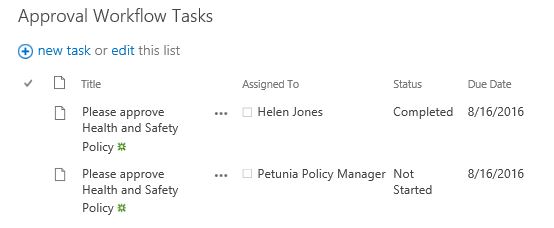
I chose a serial order for the tasks so once the workflow is started the first task is created. I included the Approval Workflow Tasks app on my Policy Creation Workspace so all of the tasks will be viewed when the page refreshes.
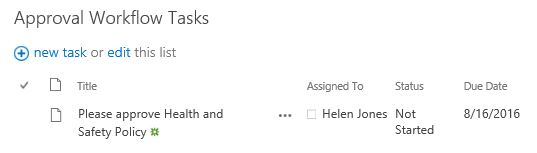
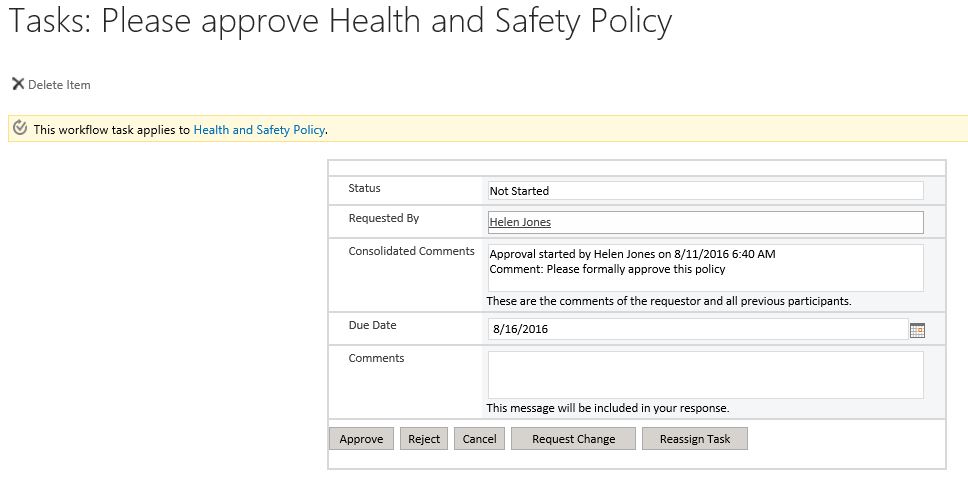
When I clicked on the task, the window below opened showing me all of the relevant details. Clicking on the link to the document (in the yellow bar) opens the policy. This ensures you can check you are actually approving the correct version and that all of the details are correct. Once checked you then select the most appropriate button at the bottom of the window. You may wish to approve, reject, cancel, request further changes or reassign the task to someone else.
I approved the document, so the second task in the series was created for Petunia, our Policy Manager. She received a similar task to the one I got and also had the opportunity to make the same decision about the task as I did.
After all of the tasks are completed, the document shows as approved in the policy library.
Use DocRead to Assign the policy to relevant employees
Now you have a fully approved policy, you may need to get relevant employees to read/acknowledge/understand the implications of it. A SharePoint workflow can't easily be used to get a large number of employees to complete compliance tasks. This is why we created DocRead. DocRead can easily manage the policy distribution process. It will ensure the right policies are reviewed by the right members of staff. A comprehensive reporting suite allows you to track who has / has not kept up to date with their compliance tasks.
Find out more here.
I hope you have found this useful!
You may also like:
July 10, 2026
July 3, 2026
The Difference Between Governance Infrastructure and Governance Theater Most organizations don’t lack governance. They ...
June 19, 2026
The Difference Between Governance Infrastructure and Governance Theater Most organizations don’t lack governance. They ...
June 5, 2026
The Difference Between Governance Infrastructure and Governance Theater Most organizations don’t lack governance. They ...
May 29, 2026
The Difference Between Governance Infrastructure and Governance Theater Most organizations don’t lack governance. They ...
May 22, 2026
The Difference Between Governance Infrastructure and Governance Theater Most organizations don’t lack governance. They ...