How to Create a New Document Library
This post explains how to create a new Document Library in SharePoint 2010. It also explains the creation of 2 columns that can (optionally) be configured for use with DocRead.
1. Select ‘Site Actions’, then ‘View All Site Content’.
2. Click ‘Create’.
3. Under Document library input a name for your new library, then click ‘Create’.
4. If you are going to use this library for storing your DocRead documents it is a great idea to consider using a document comments field and a document id field.
If you already store document comments and have unique document id’s then skip the next few points and go straight to 10. Keep a note of the fields currently used and nominate them when configuring DocRead.
If you don’t currently use additional comments or ID’s , then the next few points ( 5 – 9) will show you how to create fields to use.
5. Select ‘Create Column’ in the top icon bar.
6. In the Column Name box write ‘Document Comments’ and select ‘Multiple lines of text’ then click ‘OK’.
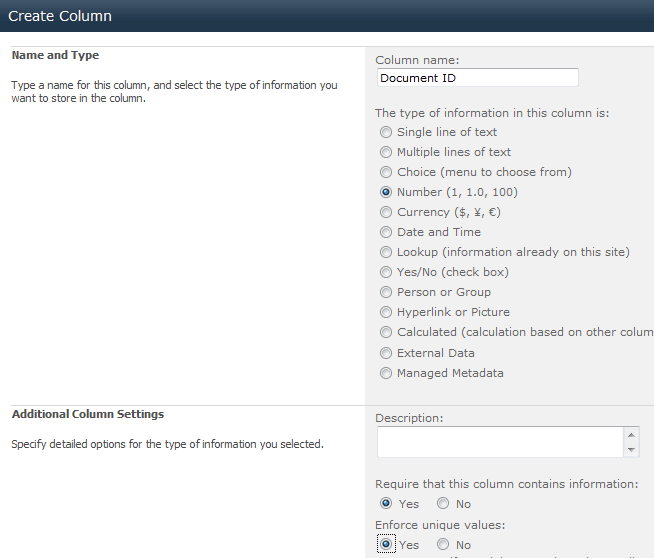
7. Create another column called ‘Doc Id’, which should be a number.
8. In the boxes at the bottom of the screen select ‘Yes’ for ‘Require that this column contains information’ and ‘Enforce unique values’.
9. Click ‘OK’, then ‘OK’ again to allow it to index the column.
10. Add the documents you wish to this library as normal (or refer to the ‘How to Add Documents to a Document Library‘ post.)


